Krumkake: What the Norwegian Waffle Cookie Is and How It's Made
 By
Diego Cortés
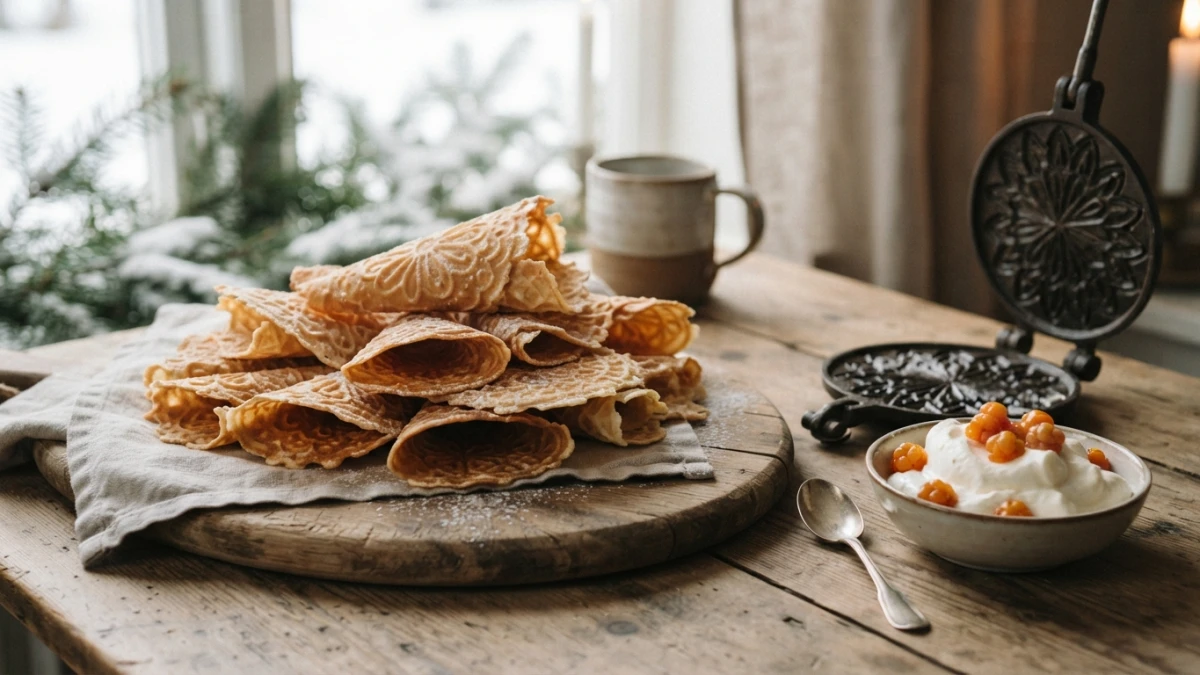
Krumkake is the Norwegian waffle cookie: a wafer-thin sheet baked between two patterned plates and rolled into a cone while it is still too hot to hold. You bake it flat on a krumkake iron and shape it with your hands in the few seconds before it sets.
The batter is thin and made with flour, butter, eggs, sugar and milk. Each round measures 13 to 20 cm before rolling, which is why the krumkake vs pizzelle question usually comes up: both come off a hot iron, but only one is meant to be curled.
What krumkake is and where the name comes from
The name is transparent. In Norwegian krum means bent or curved and kake means cake or cookie, so krumkake is literally "curved cake". The plural is krumkaker, the form you see in most family recipes. Close enough in English: "KRUM-kah-keh".
It is not an industrial ice cream cone, and it does not come out of the oven already shaped: it is a fresh-batter wafer with real butter and a scent of vanilla or cardamom, eaten plain or filled, and in Norway it belongs to Christmas rather than summer.
History: from iron plates to the Norwegian Christmas table
Krumkake was born attached to a tool, not a baking pan: a two-sided iron much like a waffle iron, engraved with patterns that print onto the batter. The old ones were cast iron, set over an open fire and flipped by hand; electric versions with a thermostat came much later. Nineteenth-century irons decorated with the national coat of arms now sit in museums, and by then the cookie was already established as seasonal baking, with no founding date, passed from notebook to notebook.
The calendar is clearer. Norwegians bake large batches before the holidays along with other iron cookies such as sandbakelse and rosettes, and bring them out after Christmas Eve dinner. Norwegian emigration in the late nineteenth century carried the recipe to New England and the Midwest, where it still shows up on December cookie trays.
The krumkake iron: how it works and what to buy
The mechanism is simple. Batter goes in the middle of the hot plate, the iron closes, and the heat does two jobs at once: it cooks and it dries. In 30 to 60 seconds the wafer is golden and still soft; leave it longer and it toasts and cracks the moment you roll it. The engraved pattern is the cookie's visual signature.
There are two formats. The stovetop iron is cheap and manual: you judge the heat by eye and flip it, so the first wafers almost always burn. The electric one has a thermostat, a non-stick surface and sometimes room for several wafers at a time. Then you need a cone mold, which is what actually sets the shape. It is a single-purpose appliance: a pizzelle iron does the same job with a different pattern.
How it is made: the five keys to the technique
The first key is the batter. Krumkake batter is thinner than pizzelle batter so the wafer comes out delicate enough to bend. Mix it without over-beating, because trapped air turns into bubbles and the wafer snaps, then let it rest 30 to 45 minutes so the flour hydrates and the cookie crisps better. There is a guide to types of flour and their uses if you want to know what each one does for the crunch.
The second is quantity: one tablespoon per cookie, spread by the closed iron itself. Too much and the wafer is thick and cannot be rolled; too little and you get a lacy cookie full of holes. The third is temperature: the iron must be properly hot before the first spoonful, or the batter sticks and the pattern never prints. The fourth is time, that 30 to 60 second window you learn by colour: light gold is right, brown is late.
The fifth is speed, and it ruins more batches than anything else. The usable window is three or four seconds: lift the wafer with a spatula, lay it on a clean cloth and roll it around the cone. The cloth keeps your fingers intact and helps you press. Let it cool on the mold, seam down, then move it to a rack. It is assembly-line work, and it is great with kids around if you give them the passing job: this guide to cooking with kids has age-by-age tasks that fit this kind of baking. Exact amounts and steps live in the krumkake recipe, with the amounts and the timings.
How it is served: fillings and the Norwegian table
Plain counts too. Half the time krumkake is served with nothing but a dusting of powdered sugar, next to coffee or gløgg, the spiced hot wine of the season. The house filling is whipped cream, and at Christmas the one that matters is multekrem, cream folded with cloudberries and sugar, the Norwegian Christmas Eve dessert served with krumkake or with kransekake.
The golden rule is to fill at the moment of serving: a cream-filled krumkake lasts minutes, not hours, because moisture crosses the wafer and turns it to cardboard.
Krumkake, pizzelle and goro: the differences that matter
Against the Italian pizzelle, the answer is in the batter. Both are iron wafers, but pizzelle batter has baking powder, is thicker and is traditionally flavoured with anise, and it comes off the iron flat and stays flat. Krumkake has no chemical leavening, is flavoured with vanilla or cardamom and exists to be rolled while hot: thick batter simply will not bend. If a batch comes out flat and crisp, serve it anyway, in the iron-cookie family alongside sweet macaroons.
Against goro, the other Norwegian iron classic, the difference is the final shape: goro is made with egg, cream, fat, flour and spices, cooked on a diamond-patterned iron and left rectangular. The Norwegian Christmas tray, one line each: krumkaker (cones), goro (diamonds), sandbakelse (butter tarts), rosettes (deep-fried in an iron) and kransekake (an almond tower). If your taste runs to other kitchens, there are gazelle horns too.
Storage, variations and the mistakes that ruin a batch
Keeping them crisp takes two habits: cool them completely and close them properly. A warm cookie steams and softens on its own. Then use a metal tin or a glass jar with an absorbent sheet at the bottom and a real lid; plastic bags do not block moisture. They stay good for about two to three weeks, and they freeze well if you thaw them uncovered so they do not sweat. If they went soft, a few minutes in a low oven at 150 C brings them back.
On variations, cardamom is the traditional choice, vanilla the runner-up; nutmeg, lemon or orange zest, almond extract and browned butter all work. Two tablespoons of cornstarch make the wafer more tender, and there is a documented traditional version made with barley flour. If gluten is the problem, start from a blend with a binder: this guide to gluten-free flour blends explains how to build one.
The three classic mistakes are a cold iron, a wafer that is too thick, and leaving the next cookie on the iron while you roll the previous one. The fourth is quiet: rolling without a mold and with bare fingers.
Frequently asked questions about krumkake
What is it: a thin, crisp Norwegian wafer shaped into a cone. Where is it from: Norway, with a close cousin in Sweden called goro. Does it taste strong: no, of butter, sugar and mild vanilla or cardamom. Is it eaten plain: yes, most of the time.
Do I need a special iron: yes, or a pizzelle iron. Can I bake it in the oven: no, without pressure between two plates you get neither a thin wafer nor a pattern. How long does it keep: two to three weeks in an airtight container. Why does it crack when I roll it: it cooled down, or the batter was too thick.
How many calories: roughly 80 kcal per cookie in a batch of about 30, based on published recipes; these are estimates, not an analysis of your batch. It contains gluten and dairy, since the traditional version uses wheat, butter and milk, so anyone with coeliac disease or lactose intolerance should check the formula. It is a butter-and-sugar cookie, eaten in moderation.